Rendering my balls in a fragment shader
This is a page about writing basic OpenGL fragment shaders
I'm a programmer who spends part of his time each week teaching kids about computers and electronics. In our recent classes, we've been learning about various computer vector graphic libraries and the usefulness of linear algebra. To give the kids a bit of fun, I decided we would write a 2D pool table simulation as a further demonstration of programming and high school math.
After having completed most of the features we wanted, including accurate physics, ball path mapping and replay, table time freezing with zooming and panning, as well as a mathematics overlay, I wanted to work on the visual aesthetics and presentation of the program. As this is a top down 2D pool simulation, we've been using colored circles to represent the pool balls in our simulation. After implementing a detailed table view with zooming, I realized that using circles as a representation of pool balls is both boring and a bit too unrealistic. Circles neither convey a sense of movement or the mechanics of a ball spinning and rolling.
Starting out flat
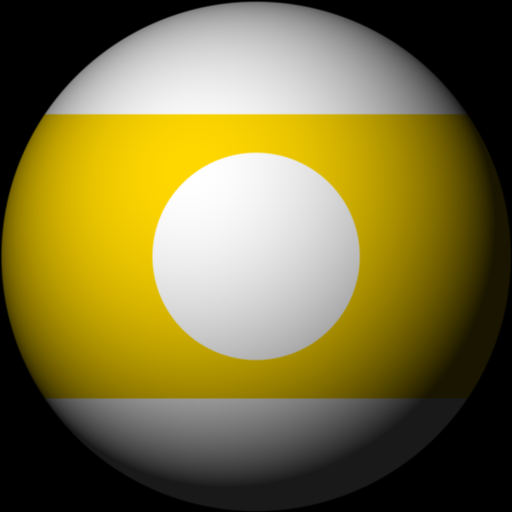
So this weekend I thought I'd implement a surprise for my kids. Since we were using an OpenGL fragment shader to convert the squares into circles, I thought about writing a fragment shader to render fully 3D looking billiard balls.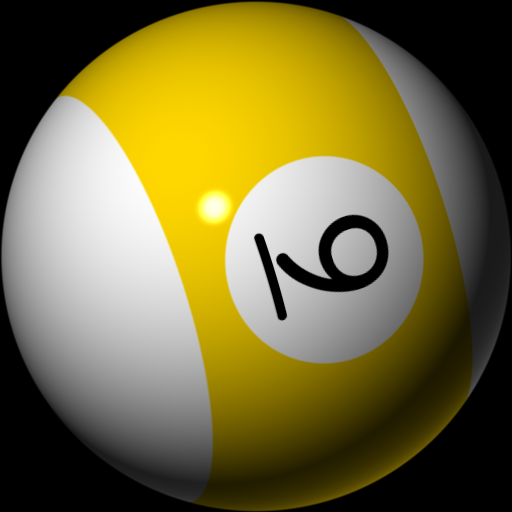 This is not a 3D rendered sphere. It's just a square.
The above image is a capture of the pixels I've created to replace the flat circles in our pool simulator. I used the term pixels, because there is no geometry used in creating the pool ball render above. Instead I am still using the same squares, but I've replaced the circle generation in an OpenGL fragment program with one that is a bit more advanced.
Here is how it works
First, we start out with a blank square. A blank square of 512px size.
void main() {
  gl_FragColor = vec4(0);
}
I'm rendering these pool balls at a size of 512px so that we can see the details. Impressive isn't it? :)Generating a circle
The next thing I wanted was to create a circle. I decided to use the frame size to determine the final size of the ball.A circle is generated like this.
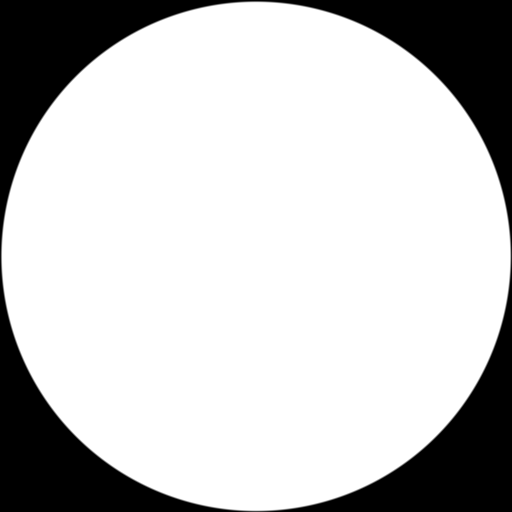 Our circle uses a radius equal to half the frame size.
uniform float size;

void main() {
    // convert resolution to coordinates in the 0..1 range
    vec2 coord = gl_FragCoord.xy / size;
    // use the center to create a circle mask
    vec2 center = vec2(0.5, 0.5);
    float d = distance(center, coord) / 0.5;
    float a = d > 0.99 ? 1.0 - smoothstep(0.99, 1.0, d) : 1.0;
    gl_FragColor = vec4(1.0, 1.0, 1.0, a);
}
Okay, so what is going on here? Well I begin by converting our current pixel gl_FragCoord
into a coordinate range between 0 and 1. Then I create the center of our circle vec2(0.5, 0.5)
in order to test the distance to the current pixel.But what is going on with this variable
a
? Well if you didn't know, fragment shaders do not create smooth edges. You can read more about that problem here in an article I wrote 15 years ago! The short of it is, if we want a smooth edge to our circle inside a fragment shader, we need to smooth it ourselves, and that's exactly what smoothstep
is doing for us.Make it a sphere with normals
Now we need to turn our circle into a 3D looking sphere. To do that we need to create surface normals for our circle. A normal is a unit length vector pointing in the "up" direction of a surface.Here is how we can create the normals for our circle.
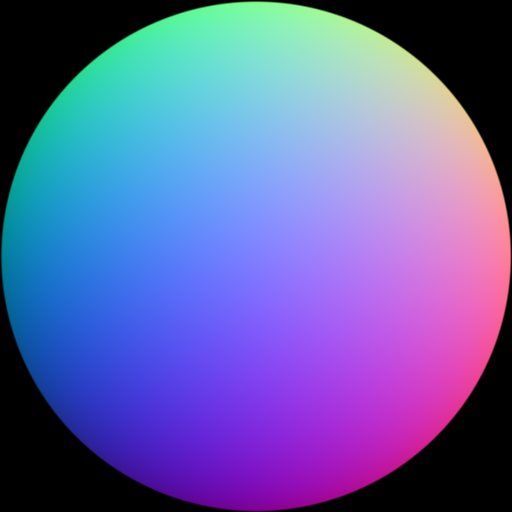 A normal map is computed for our circle.
    // create uv coords in the -1..1 range
    vec2 uv = (2.0 * coord - 1.0);
    // build our normal using xy and a calculated z
    vec3 n = vec3(uv, sqrt(1.0 - clamp(dot(uv, uv), 0.0, 1.0)));
    // generate a surface normal map
    vec3 map = 0.5 + 0.5 * n;
    gl_FragColor = vec4(map, a);
To build our normal we begin by converting our coord to a range between -1 and 1. Then we use those xy values and compute a z value. Finally, we map each component to rgb float values and display that result.Adding light and color
We're ready to add basic lighting, turning our circle into a sphere. While testing we're going to control the light position with the computer mouse. Values passed from our CPU program to our GPU program are sent by way of uniform values. Our light position uniform isuniform vec2 lightpos
.And this is our basic lit and colored sphere.
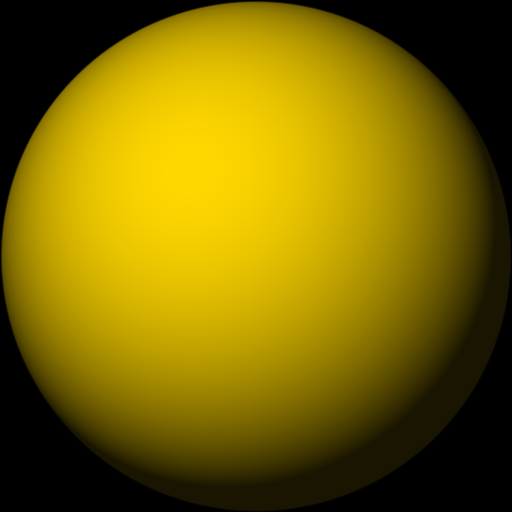 Using basic lighting and a color.
    // create a primary light source
    vec3 light = vec3(lightpos.x, -lightpos.y * 3.0, 200.0);
    // normalize the light as a direction
    light = normalize(light);
    // use dot product to find the brightness of the pixel on the sphere
    float brightness = clamp(dot(light, n), 0.1, 1.0);
    vec3 yellow = vec3(1.000, 0.843, 0.000);
    gl_FragColor = vec4(yellow * brightness, a);
In the above fragment shader code we're creating a light using the mouse input stored in uniform lightpos
. As the mouse is a 2D input device we're using it to controll the x and y position of the light, while setting the z to 200.0
which is in front of the sphere. Next we normalize the light, as we want to simulate a distant light and not a point light. We use the dot
product function to determine the brightness of the pixel and clamp
it to a min of 0.1 and max of 1.0. The clamping min value simulates an ambient lighting value.To compute the final sphere pixel color we simply multiply our select color
yellow
by our computed brightness
, making sure to mask the circle shape again with a
.Solids and stripes
Our pool balls need to have solid or stripe diffuse patterns along with a circle for the ball numbers. To accomplish this we are going to write acolorLookup
function that takes a point on the sphere and a ball number. This function will determine whether a ball is the cue ball, a solid, or a stripe. Later it will also map the number textures to our ball.This is our ball with the diffuse color pattern computed.
 It's starting to look like a pool ball.
uniform int ball;

const vec3 white = vec3(1.0);
const vec3 yellow = vec3(1.000, 0.843, 0.000);

vec3 colorLookup(vec3 point, int number) {
  // the cue ball is white
  if (number == 0)
    return white;
  // all other balls have a zero based index
  number--;
  float d;
  // use a fixed color of yellow for now
  vec3 color = yellow;
  // if we are in a striped ball
  if (number > 7)
    if (abs(point.y) > 0.55) {
      // smooth the stripe
      d = abs(point.y);
      d = smoothstep(0.55, 0.56, d);
      return mix(color, white, d);
    }
  // generate the circle for the number area
  d = distance(point.xy, vec2(0));
  // smooth the circle
  if (d < 0.4) return white;
  d = smoothstep(0.4, 0.41, d);
  return mix(white, color, d);
}

// in our main function
vec3 diffuse = colorLookup(n, ball) * brightness;
gl_fragColor = vec4(diffuse, a);
Okay, so there is a bit to unpack here. First, we've introduced the uniform ball
to select the ball number, which is then used by the shader to determine the diffuse pattern and color to some extent. For now, we either get a white cue ball or a yellow ball. The
colorLookup
function first checks if we if it's being asked to get the color of a cue ball. If that is the case then it simply returns white. After that it decrements the ball number as we'll later use it as a zero based index for calculating texture coordinates and accessing a color array.Next, we check if the ball is a stripe. We only need to address the stripe if
abs(point.y) > 0.55
. What this means is that the colored areas of both solid and striped balls are handled the same if they are in the lower half of the y area.Then we leave a white circle for our eventual ball numbers by checking if the xy coords are less than 0.4 from the z axis.
Note, we are smoothing both the stripe and the circle just as we smoothed the edge of the circle previously.
Numbering and coloring
It's time to prepare for texture mapping numbers unto our billiard balls as well as picking the correct diffuse colors based on the ball number. I couldn't find the exact font matching the style frequently seen on the balls in so many billiard rooms, so I finagled some comparable looking numbers using Inkscape the vector drawing program.
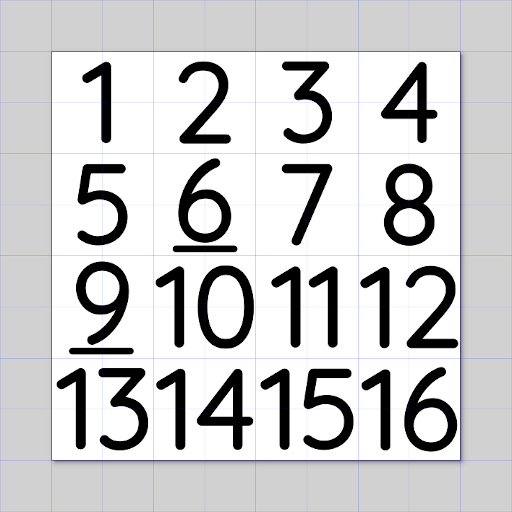 A 1..16 ball number texture.
// ball color data
vec3 colorData[8] = vec3[](
  vec3(1.000, 0.843, 0.000),
  vec3(1.000, 0.000, 0.000),
  vec3(0.000, 0.000, 1.000),
  vec3(0.502, 0.000, 0.502),
  vec3(1.000, 0.647, 0.000),
  vec3(0.000, 0.502, 0.000),
  vec3(0.549, 0.000, 0.102),
  vec3(0.100, 0.100, 0.100)
);
In the above code, we've created an array to hold the lookup values for our ball colors.
Texture mapping
We're ready to map the texture to our balls. We're going to modify thecolorLookup
function to check if the xy coordinates on either side of the ball are within the area we want to texture.Here is how it's done.
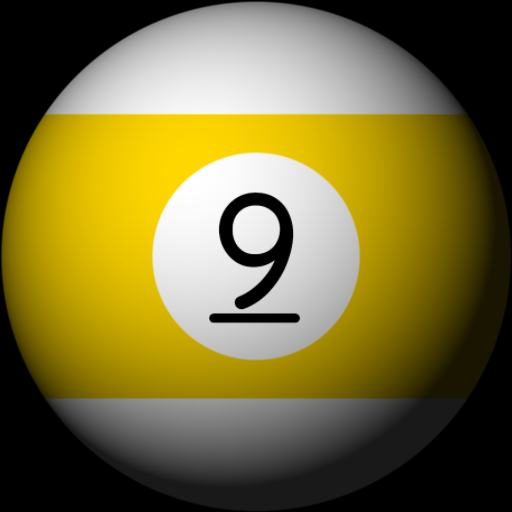 We have a number.
// area reserved for ball number texture
const float square = 0.28;
// clean up factor for texture artifacts
const float edge = 0.0033;

vec3 colorLookup(vec3 point, int number) {
  // the cue ball is white
  if (number == 0)
    return white;
  // all other balls hae a zero based index
  number--;
  vec3 color;
  // if we're in the area where a number should be mapped
  if (abs(point.x) < square && abs(point.y) < square) {
    // convert the point to a texture coordinate
    vec2 tex = (point.xy + vec2(square)) / (square * 2.);
    // flip it on the y
    tex.y = 1. - tex.y;
    // if we're on the backside flip the x
    if (point.z < 0.)
      tex.x = 1. - tex.x;
    // our number texture uses a 4x4 grid with 16 numbers
    tex = tex / 4.0;
    tex.x = tex.x + mod(number, 4) * 0.25;
    tex.y = tex.y + number / 4 * 0.25;
    color = texture2D(texture0, tex).rgb;
    // reset the texure coord to 0, 0
    tex.x = tex.x - mod(number, 4) * 0.25;
    tex.y = tex.y - number / 4 * 0.25;
    // and cut off texture artifacts from the edges
    if (tex.x < edge) return white;
    if (tex.x + edge > 0.25) return white;
    if (tex.y < edge) return white;
    if (tex.y + edge > 0.25) return white;
    return color;
  }
  float d;
  // get ball color from our color data
  color = colorData[int(mod(number, 8))];
  // if we are in a striped ball
  if (number > 7)
    if (abs(point.y) > 0.55) {
      // generate a smooth stripe
      d = abs(point.y);
      d = smoothstep(0.55, 0.56, d);
      return mix(color, white, d);
    }
  // generate the circle for the number area
  d = distance(point.xy, vec2(0));
  // antialias the circle
  if (d < 0.4) return white;
  d = smoothstep(0.4, 0.41, d);
  return mix(white, color, d);
}
Using the constant square
we can check if the point x and y components are within the area we want to texture map. We then copy the point to vec2 tex
and scale it to a range of 0..1. As OpenGL texture coordinates start in the bottom left we flip the y axis by subtracting it from 1. If the texture is on the negative side of z we flip the x axis, as we don't want our back numbers to be mirrored in reverse.Next, we compute the texture coordinates mindful that our texture has the numbers arranged in order using an even 4x4 grid. We use the
mod
built-in function with the number 4 to find the column, and integer /
divide operator to find the row. We locate the texel color by using texture2D
.The last bit is some clean up, as on my configuration of hardware and video driver occasionally generates unsightly seam artifacts. They are cleaned up using an edge constant.
Subtle lighting improvements
Although our render is starting to look decent, we can make a few improvements. I wanted to add a rim light to better visualize the outline of our object in the darkened areas. To do that we can simply add another light but make it somewhat behind our object.Here is my subtle rim light addition.
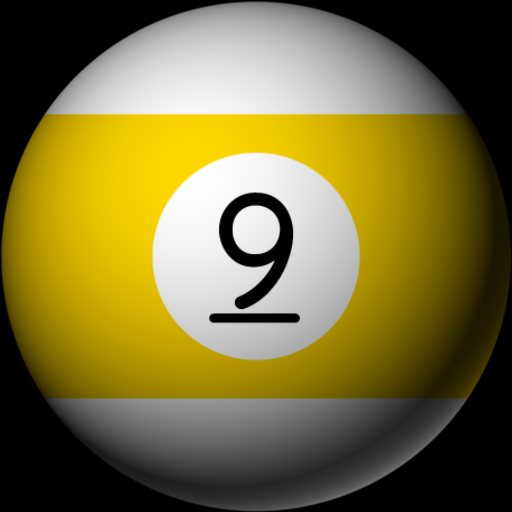 Notice the rim light in the lower right area of the billiard ball.
    // create a secondary backlight
    vec3 backlight = normalize(vec3(50.0, -90.0, -80.0));
    // calculate the backlight rim intensity
    float rim = dot(backlight, n);
    // clamp and reduce the rim intensity
    rim = pow(clamp(rim, 0.0, 1.0), 3.0);
    gl_FragColor = vec4(diffuse * (brightness + rim), a);
This is quite easy. We're repeating what we've already done with the main light, but it's positioned behind the ball. Note it's mostly from behind with a z value of -80. It's important that we clamp
the dot product because it will contain negative values as it's behind the object. The rim light is simply added to the brightness and then they are used to moderate the diffuse color.
Putting it all together
We're ready to put on the final touches. We can add a specular light and begin animating our billiard ball viewing it from any angle. Here is how it looks with a simple random orbit animation.Our ball with specular highlights and animation.
The complete shader program
And at last, here is a list of all the shader program pieces put together. Feel free to copy or make your own changes without restriction.#define PI 3.14159265358
// a texture with the numbers 1..16
uniform sampler2D texture0;
// size of the render area
uniform int size;
// light source controlled by the mouse
uniform vec2 lightpos;
// animated angle used to rotate the ball
uniform float angle;
// ball number 0..16
uniform int ball;
// optional specular highlights
uniform int highlight;
// the default ball color
const vec3 white = vec3(1.);
// area reserved for ball number texture
const float square = 0.28;
// clean up factor for texture artifacts
const float edge = 0.0033;
// rotate on the X axis
mat4 rotationX(float angle ) {
return mat4(
1., 0., 0., 0.,
0., cos(angle), -sin(angle), 0.,
0., sin(angle), cos(angle), 0.,
0., 0., 0., 1);
}
// rotate on the Y axis
mat4 rotationY(float angle) {
return mat4(
cos(angle), 0., sin(angle), 0.,
0., 1.0, 0., 0.,
-sin(angle), 0., cos(angle), 0.,
0., 0., 0., 1);
}
// rotate on the Z axis
mat4 rotationZ(float angle) {
return mat4(
cos(angle), -sin(angle), 0., 0.,
sin(angle), cos(angle), 0., 0.,
0., 0., 1, 0.,
0., 0., 0., 1);
}
// ball color data
vec3 colorData[8] = vec3[](
vec3(1.000, 0.843, 0.000),
vec3(1.000, 0.000, 0.000),
vec3(0.000, 0.000, 1.000),
vec3(0.502, 0.000, 0.502),
vec3(1.000, 0.647, 0.000),
vec3(0.000, 0.502, 0.000),
vec3(0.549, 0.000, 0.102),
vec3(0.100, 0.100, 0.100)
);
// lookup the color and texture pattern for a point on the ball
vec3 colorLookup(vec3 point, int number) {
// the cue ball is white
if (number == 0)
return white;
// all other balls have a zero based index
number--;
vec3 color;
// if the area where a number should be then we texure map
if (abs(point.x) < square && abs(point.y) < square) {
// convert the point to a texture coordinate
vec2 tex = (point.xy + vec2(square)) / (square * 2.);
// flip it on the y
tex.y = 1. - tex.y;
// if we're on the backside flip the x
if (point.z < 0.)
tex.x = 1. - tex.x;
// our number texture uses a 4x4 grid with 16 numbers
tex = tex / 4.0;
tex.x = tex.x + mod(number, 4) * 0.25;
tex.y = tex.y + number / 4 * 0.25;
color = texture2D(texture0, tex).rgb;
// reset the texture coord to 0, 0
tex.x = tex.x - mod(number, 4) * 0.25;
tex.y = tex.y - number / 4 * 0.25;
// and cut off texture artifacts from the edges
if (tex.x < edge) return white;
if (tex.x + edge > 0.25) return white;
if (tex.y < edge) return white;
if (tex.y + edge > 0.25) return white;
return color;
}
float d;
// get ball color from our color data
color = colorData[int(mod(number, 8))];
// if we are in a striped ball
if (number > 7)
if (abs(point.y) > 0.55) {
// generate a smooth stripe
d = abs(point.y);
d = smoothstep(0.55, 0.56, d);
return mix(color, white, d);
}
// generate the circle for the number area
d = distance(point.xy, vec2(0));
// antialias the circle
if (d < 0.4) return white;
d = smoothstep(0.4, 0.41, d);
return mix(white, color, d);
}
void main() {
// convert resolution to coordinates in the 0..1 range
vec2 coord = gl_FragCoord.xy / size;
// use the center to create a circle mask
vec2 center = vec2(0.5, 0.5);
float d = distance(center, coord) / 0.5;
float a = d > 0.99 ? 1.0 - smoothstep(0.99, 1.0, d) : 1.0;
// create uv coords in the 0..1 range
vec2 uv = (2.0 * coord - 1.0);
// build our normal using xy and a calculated z
vec3 n = vec3(uv, sqrt(1.0 - clamp(dot(uv, uv), 0.0, 1.0)));
// create a primary light source
vec3 light = vec3(lightpos.x, -lightpos.y * 3., 200.);
// normalize the light as a direction
light = normalize(light);
// optional specularity
float spec = 0.;
if (highlight > 0) {
// generate the specular shine
vec3 r = reflect(-light, n);
vec3 spot = n * 10.;
spot.z = 400.;
vec3 v = normalize(spot);
float bounce = max(dot(r, v), 0.);
spec = pow(bounce, 10.);
spec = smoothstep(0.5, 1.0, spec);
spec = pow(spec, 30.) * 0.9;
}
// map the normal to a vertex
vec4 vert = vec4(n, 0.);
// rotate the vertex to spin the ball
vert = rotationX(angle) * vert;
vert = rotationZ(angle * PI / 3.) * vert;
vert = rotationY(angle / 3.) * vert;
// lookup the color of the vertex for a given ball
vec3 diffuse = colorLookup(vert.xyz, ball);
// calculate the light as brightness intensity with 0.1 ambient lighting
float brightness = clamp(dot(light, n), 0.1, 1.);
// create a secondard back light
vec3 backlight = normalize(vec3(50., -90., -80.));
// calculate the backlight rim intensity
float rim = dot(backlight, n);
rim = pow(clamp(rim, 0., 1.), 3.);
// calculate the final diffuse color
diffuse = diffuse * (brightness + rim);
// output the color while masking the circle
gl_FragColor = vec4(diffuse + spec, a);
}